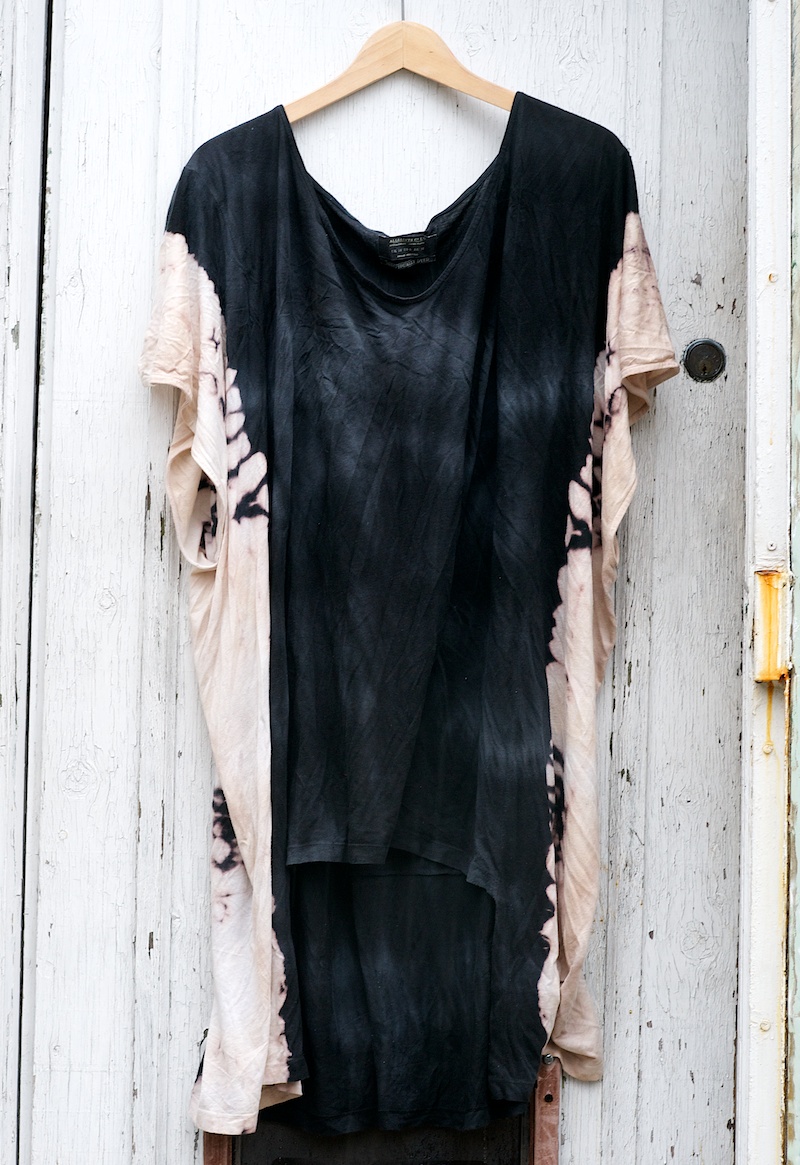
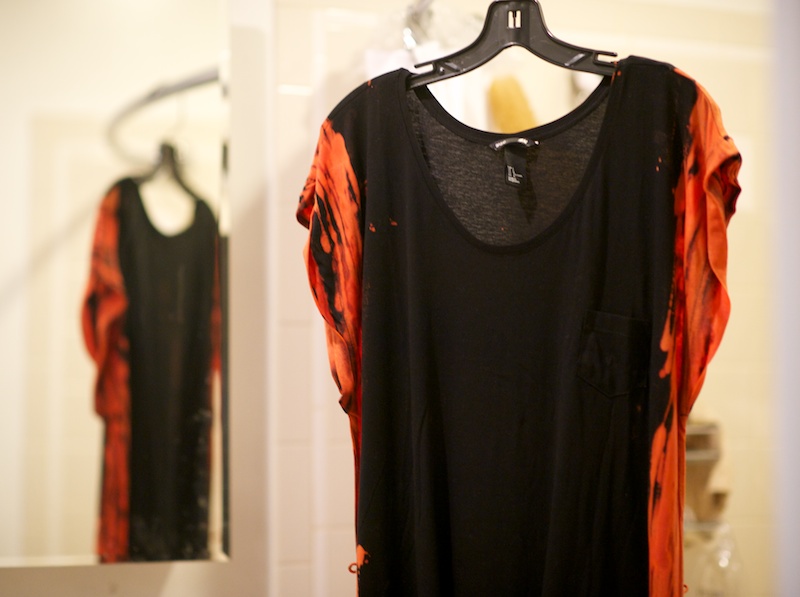
This (sold out) All Saints tunic dress belongs to my girlfriend. She made a DIY version too but ended up buying this original All Saints version. I LOVE it. The slouch, the pattern. The lot. Did NOT like that it’s now sold out.
That’s it – time to make my own sodding version…
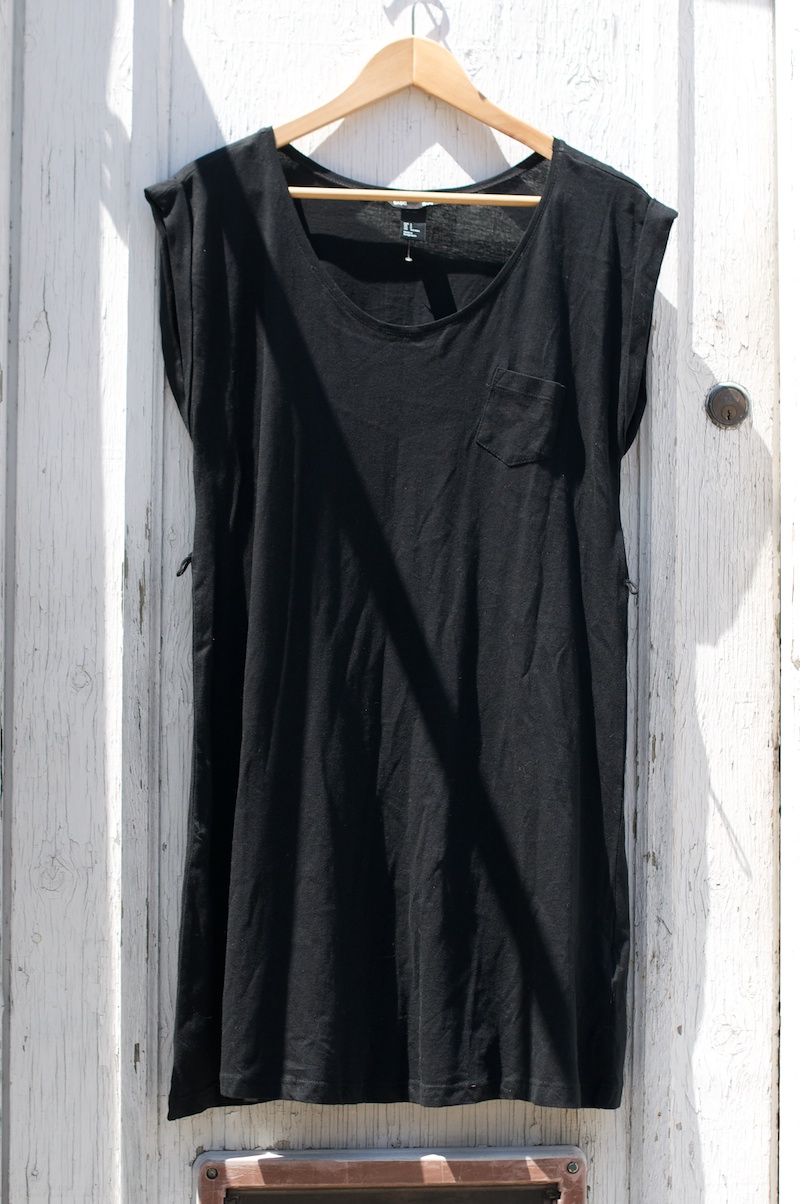
1. Get a long t-shirt/tunic. I got this from H&M basics for $12. This is a size S used for testing but I ended up using an L for the final version.
2. Lay one side of the tunic on the edge of your bath tub. Using the bleach nozzle, squirt long lines of gel bleach along the sides. The gel is more precise for squirting than a watery liquid bleach.
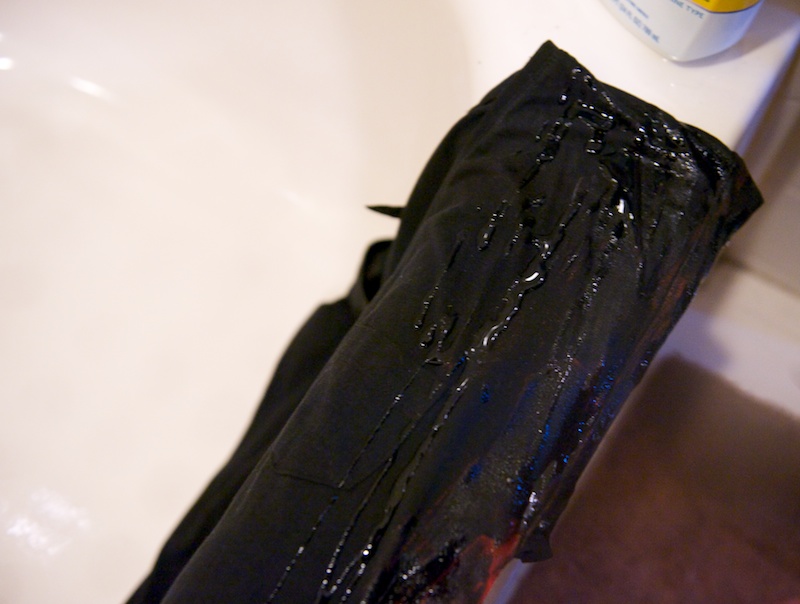
3. Within a few minutes you’ll see the bleached areas. Switch to other side of tunic and the back. Be careful to NOT get bleach in the center of the tunic. Add less than you think since bleach bleeds.

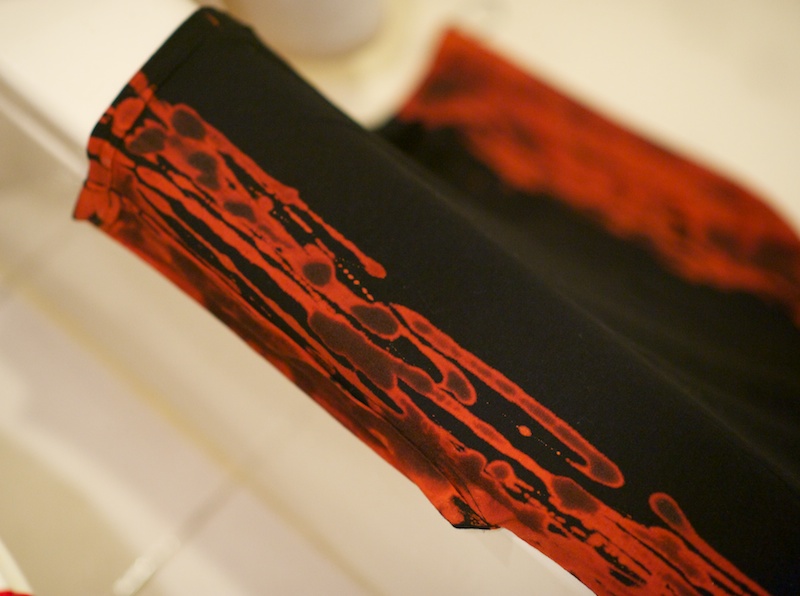
4. As it dries you’ll see the areas you bleached show through even stronger. It goes red first before getting ligher. It’s like watching flipping magic. At this point add a little more in certain areas if you want.
5. Leave it to hang to see how it looks (lay down plastic or kitchen towel squares on the floor to catch drips). After a few hours wash it in water to take out the bleach and re-hang to dry.
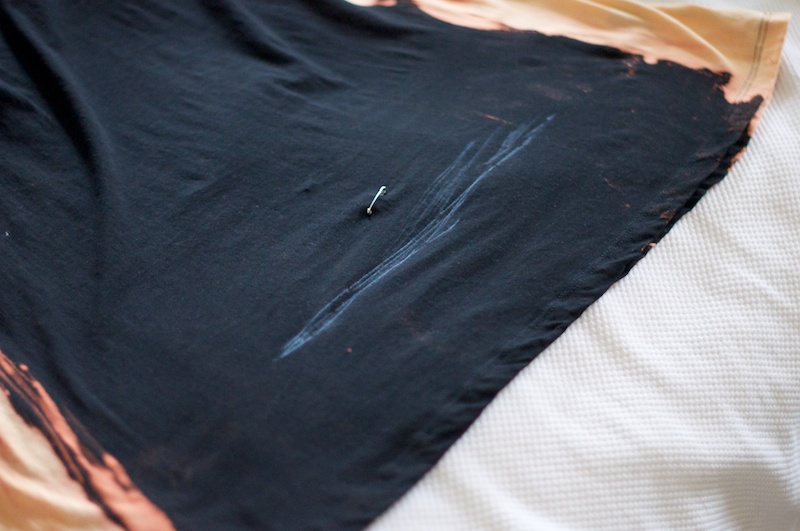
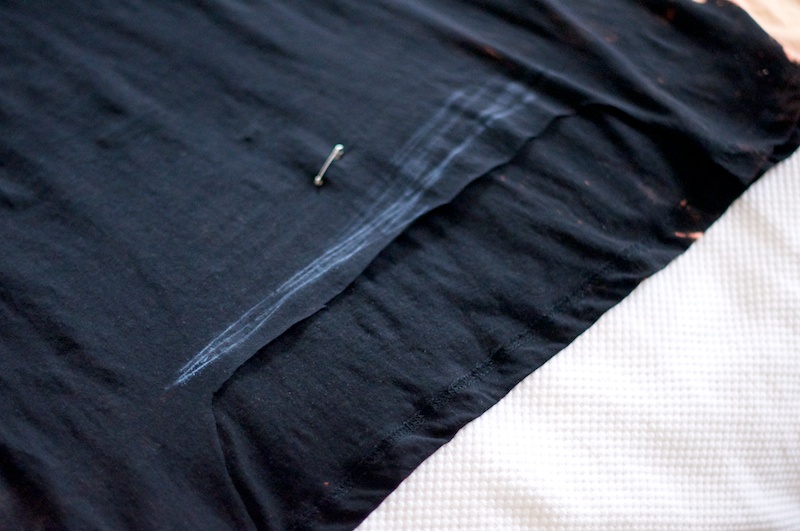
6. Once dry, use a chalk marker or pins to mark where you want to cut out the asymmetric hem (higher in front).
7. Cut lower than you think and try on, that way you can cut higher and higher till it’s how you want it. As you can see I’m not precise with how I cut but that’s part of the finished appeal to me anyway.
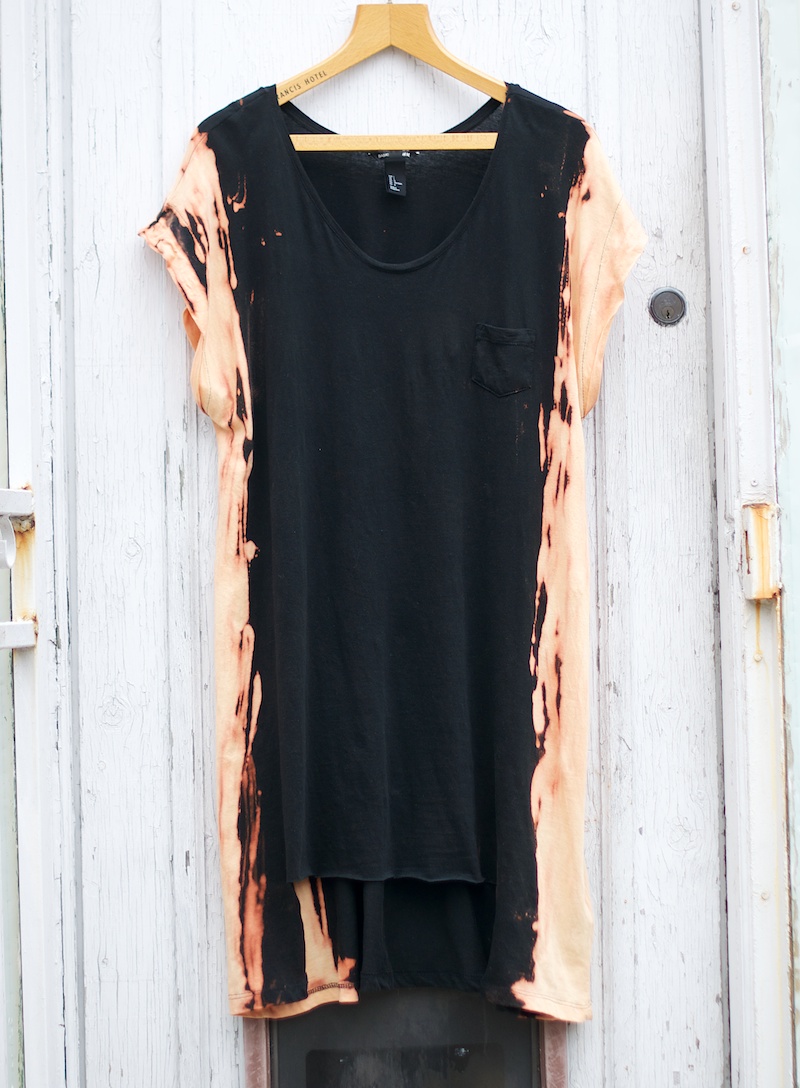
8. The finished result: your own DIY All Saints dress. Add sandals or old boots and bob’s your uncle! Practice your smug face when asked WDUGT that dress from.
Note: I un-cuffed the stitched sleeves on the tunic so they are longer on the arm like the All Saints version (see pics #1 & #2 of sleeves).
A size XL is better for maximum slouch factor but bleach relaxes fabric so this’ll work for now.
Experiment with bleaching different tunic colours. Imagine if this tunic was dark red instead of black?


Eat.Style.Play says:
This looks good!! a Bleach pin does that?? Hummm i need to invest in some of these for some other DIY’s haha.
Talisa Tossell says:
This looks GORGEOUS!
http://talisatalksbeauty.blogspot.co.uk/2013/04/loccitane-almond-shower-oil.html
Emijaa Jaaemil says:
LOVE LOVE LOVE this DIY – one that I ACTUALLY might try out! awesome post!
xx, EJ
http://www.emijaajaaemil.com
Joana says:
This one’s amazing x
Granny Gee says:
This is amazing! Such a great post, I think I prefer yours to the original!
grannygee.blogspot.com
x
Anonymous says:
Not a bleach pen. It’s gel bleach that comes out from a skinny spout.
Lady Bug says:
Perfect! Absolutely perfect!
Jasmine Denise says:
I love this
____________________-
http://themodestmushroom.blogspot.com/
Jane says:
Such a cool DIY. Will try it this week-end for sure !!
Lucy Mason says:
I think I prefer the DIY one! Great post! xx
http://www.itslilylocket.blogspot.com
PinkCheetahVintage says:
whoa! awesome!
Becky 🙂
Christina Ooi says:
Awesome, awesome, AWESOME! I love this!!!
http://www.queenofmayhem.com
http://www.queenofmayhem.com
The White List says:
Looks amazing! Would be nice to photos of you wearing it to see how you’d style it and how it fits!
Also, how do you come up with these – they’re some of the most amazing DIYs I’ve been privy to see!
Anonymous says:
This is great!
You should show your finished DIY as the product image, because it will entice more people to click on your link.
kayaretro says:
great idea!!!love it..
Jessica says:
Haha that’s so funny! Good job. I got that in dress form with long slits up the sides (legs) from All Saints summer sale last year and wear it belted. My boyfriend calls it the ‘druid dress,’ I get compliments all the time and it moves wonderfully. I hope your DIY shirt is equally loved!
modafromdusktildawn says:
Love this post! Definitely am going to have try this for the summer!
Danielle xx
Moda from Dusk ’til Dawn
Micheal Hussey says:
This blog post is really great; the standard stuff of the post is genuinely amazing.
bubblegum casting
Hapinesswherever says:
Love this! Not done an All Saints DIY for my blog yet but definitely coming soon. More likely accessories though 😛